Well, the wedding planning was absolutely crazy! There were a lot of things that I wanted to do that I didnt get to because I ran out of time. HERE you will find all of the things that actually happened, the DIY that was actually created and everything in between. If you would like templates (if I have them) or want to know how I made something see the Contact Us page and email me!
The Dress
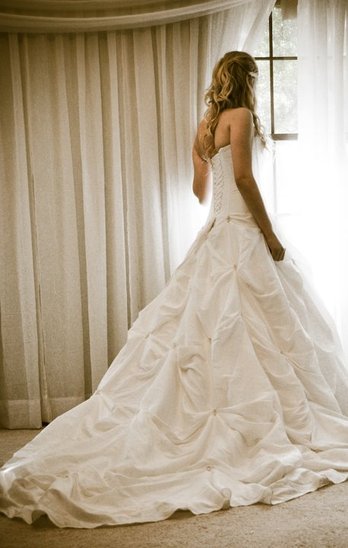
This is my dress! I LOVED it! It made me feel like a princess and the little girls were following me around calling me a princess! It was the dress of my dreams!
It came from David's Bridal.
It came from David's Bridal.
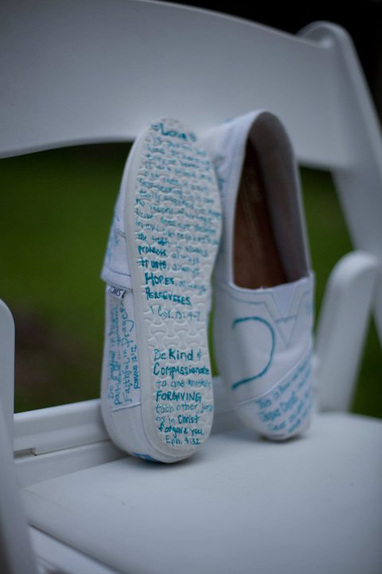
The Shoes

I was extremely proud of my shoes. They are TOMS that I grafitied with the Promises of God. I got this idea from an 8 year old little girl fighting cancer. She would write the scriptures on her shoes so she was walking into treatment on the promises of God. She passed away a few months before my wedding, so in honor of her I stole her idea and incorporated it into my special day. I found the blue sharpie that matched my wedding colors at walmart. I spent a few days researching the Bible and my favorite scriptures. My shoes were COVERED in scripture- even the bottom of the soles. I didnt put them on until the day of and it was a VERY special moment for me. It meant the world to me to be walking in the promises of God on one of the most important days of my life.
ELLIE- This is for you, may you watch over us from above; you are sorely missed!
ELLIE- This is for you, may you watch over us from above; you are sorely missed!
Bridal Portraits
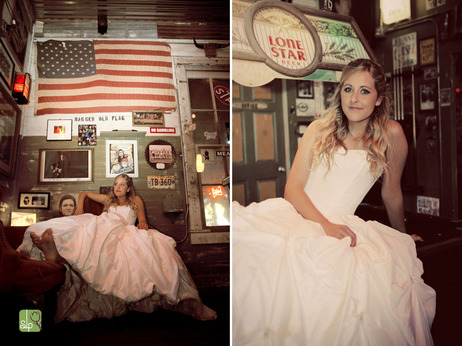
I did some of my bridals at a local bar in Austin. It's really neat, it's called the Mean Eyed Cat downtown on 5th Street. I took over the entire bar at one point lol but I got a lot of unique shots that I wanted.
More Bridal Pics

We also took a lot of bridals at Mayfield Park because that is where Beau proposed to me. I had a lot of fun...I think the heat was getting to my head lol This is a really funny one that I love!
Mayfield Park has lots of free roaming Peacocks. They are beautiful and friendly.
The Wedding Party
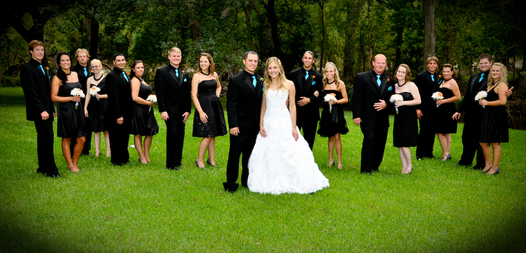
It was LARGE and In Charge lol and we were so blessed to have so many close friends and family standing with us on our special day!
Venue & the Girls
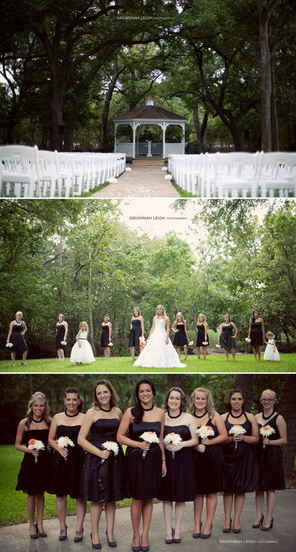
We got married outside by the gazebo. There were about 200 in attendance.
The girls all looked beautiful in their David's Bridal dresses! They all had to pick different short length styles.
We got the flower girl dresses at Ross Dress for Less for $20 each around Easter. They were beautiful, the girls loved them. We added a black ribbon around the waist and tied it in the back to incorporate the black more. We got them white ballet shoes and replaced the elastic with black ribbon and the bow on the toes with gorgeous black and rhinestone buttons.
The Girls Shoes
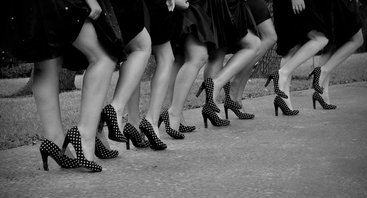
We bought the girls shoes at Dillards! They are Jessica Simpson brand. It was a HUGE pain in the butt and I dont suggest trying it lol but it turned out great in the end! :P
Outside Decor & the Boys
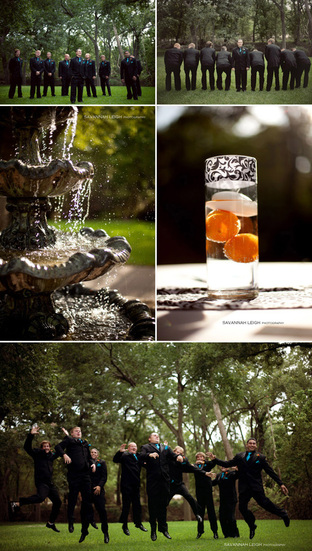
The boys rented tuxs from Al's Formal Wear. They were all black (including the vest) with an aqua blue tie and hankie. They looked really sharp!
We bought vases from Hobby Lobby and hotglued the damask ribbon around them. We bought floating candles and oranges and filled them with water. It helped add that touch of orange that I was wanting!
We bought vases from Hobby Lobby and hotglued the damask ribbon around them. We bought floating candles and oranges and filled them with water. It helped add that touch of orange that I was wanting!
Flower Girls
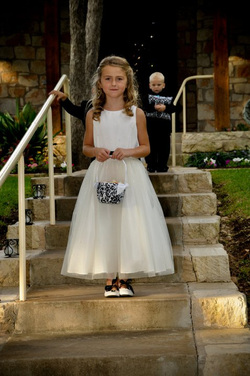
This is one of our flower girls, Preslie. You can see the work we did on their shoes and you can see her dress better. We also bought these baskets at Hobby Lobby and tore them apart and remade them! I wanted to incorporate the damask so we just used the damask fabric instead.
Ring Bearers
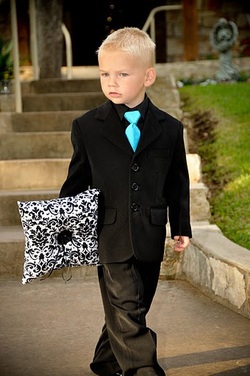
This is one of our ring bearers, Parker. We actually bought their suits at Burlington Coat Factory for $40 instead of paying $120 to rent them! We paid $10 (for both) to rent the matching ties.
My sister made the damask ring bearer pillows to match the flower girl baskets. She put a large black button and some thin ribbon (to tie the fake ring to) in the middle.
My sister made the damask ring bearer pillows to match the flower girl baskets. She put a large black button and some thin ribbon (to tie the fake ring to) in the middle.
The Invites
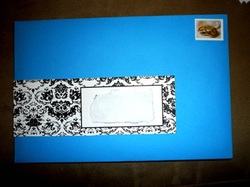
I was very proud of my invites! I bought the blue envelopes online. I ordered the invites from Vista Print and got a great deal on everything! The most expensive part was the stamps!
The wrap around labels:
They were a huge pain but they turned out beautiful! I went to the print shop and used their glossy light 8x10 paper to print the "shell" if you will. You can fit 4 (I think, it's been a while) on each sheet. Then I used my home computer to insert the addresses onto them (just put it in as paper and print on the sheet again). I then cut them all out by hand to avoid paying the extra cost for the print shop to cut them. After that I used spray adhesive to put them on the envelope- make sure you use a drop cloth because I got it on my carpet and never got it out! The front has their address and when you turn it over ours is the folded over part on the back. We got tons of compliments on them!
Cake
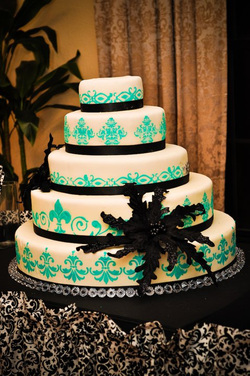
My sister made my cake, she is very talented in many artistic areas lol We used white hand made/hand rolled fondant and stenciled the blue on. We bought the black flowers from Hobbly Lobby when their Christmas stuff went on sale for about 10 cents. It looked really great and tasted really great!
Beau's Cake
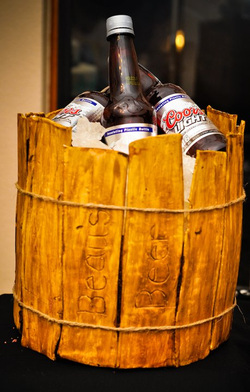
This is where she got creative! All of this (except the beer bottles) is edible! The "wood" barrel is gumpaste that she painted and stressed to look like old wood. She used rock candy for the "ice" and underneath it all is red velvet cake at Beau's request! It was all a surpise for him and he LOVED it!
The Fan Programs
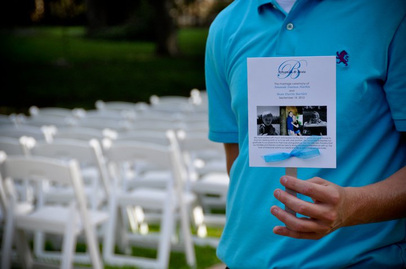
We needed something that doubled as a fan because let's face it- IT'S TEXAS!
These were a massive pain, but they were beautiful! I have a template for this as well if you're interested! I had to have them printed which costed about $100. The front has our pictures- his baby pic, our engagment pic, a baby pic of me and our "thank you"- it's actually folded over the stick (that I painted) and then we tied a ribbon through them. The back has the program info. We used spray adhesive to secure it together. Like I said- MASSIVE pain in the butt, but we had tons of compliments on them!
These were a massive pain, but they were beautiful! I have a template for this as well if you're interested! I had to have them printed which costed about $100. The front has our pictures- his baby pic, our engagment pic, a baby pic of me and our "thank you"- it's actually folded over the stick (that I painted) and then we tied a ribbon through them. The back has the program info. We used spray adhesive to secure it together. Like I said- MASSIVE pain in the butt, but we had tons of compliments on them!
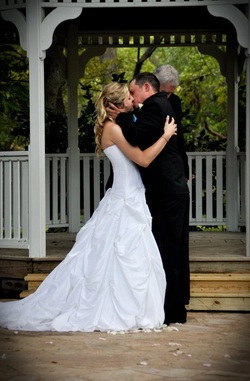
Instead of a Guest Book

I didnt want a guest book to collect dust, so I came up with this idea! We ordered a LARGE picture of us kissing in front of a pond and invited guests to write their messages on the photo! It turned out great! We have it hanging in a large frame in our livingroom! It's a conversation piece for sure- reading the messages was down right hysterical! :)
The Water Bottles
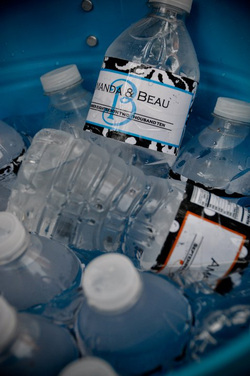
The link to the water bottles is in the DIY tab. It took forever, but it was worth it! We bought the blue metal tubs at Target for $30 each, filled them with ice and put them out for the guests to have while they waited for everything to start.
The Centerpieces
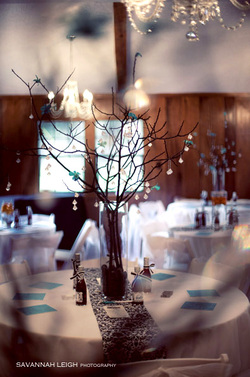
These were also a HUGE pain to make! We tried using Manzanita branches, but they just wouldnt work with this idea! So, we sold the manzanita branches, went to the lake house and picked up branches. My sister and my mom then spent DAYS stripping and painting each branch. Then we hot glued little blue paper flowers to them and strung long strings of crystals from the branches. Crystals were purchased at Hobby Lobby; Flowers were purchased from saveoncrafts.com. We put them in large vases purchased from Hobby Lobby (this was the expensive part) and filled them half way with "river rocks" from Target and Hobby Lobby.
The table runners were hand made by my mom, sister and grandmother with fabric from Hobby Lobby.
The mini wine bottles were from Beau's parents. His dad brewed the wine and bottled it himself. I made the labels and then he put them on the bottles and tied ribbons around the top. They were a HUGE hit!
Crossword/Word Find While You Wait?
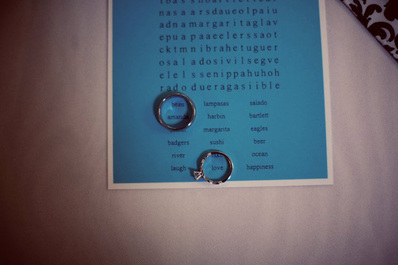
I dont even know how to describe the monthS long process this was. First I purchased cheap pens in our colors with our names and date on them. Then I went searching the web 50 times over for a template- there's not a good one. I made my own...SOMEHOW! I took it to the print shop and printed both sides- the crossword on one side and the word find on the other. Both I had created myself with the answers and clues being about us. Then I used double sided tape to attach it to a piece of white cardstock. It was a really fun conversation starter for our guests!
